
Installing and setting up an RFID reader requires careful planning and execution. This comprehensive guide will give you the knowledge and guidance you need to complete the process successfully. Let’s dive into the RFID reader installation world and uncover this transformative technology’s possibilities.
Preparation for the installation of RFID Readers
Gathering the necessary components and preparing your setup ahead of time will help ensure a successful RFID reader installation. Here’s a detailed list of what you’ll need:
Assessing Needs and Goals
Before you start installing RFID readers, you must assess your needs and goals. Consider the specific requirements of your application and determine how RFID technology can address them. Ask yourself questions such as:
- What is the purpose of implementing an RFID reader?
- What are the specific tasks or processes you aim to improve or automate?
- What are your desired outcomes and expectations from the RFID system?
You’ll understand your needs and goals by conducting a thorough assessment. This enables you to proceed with the installation process more effectively.
Selecting the Right RFID Reader for Your Needs
Once you clearly understand your needs, it’s time to choose the right RFID reader that aligns with your requirements. Consider the following factors:
- Frequency Range: Determine the appropriate frequency range (e.g., low frequency, high frequency, ultra-high frequency). These are based on your application and the types of RFID tags you plan to use.
- Read Range: Assess the required read range for your specific use case. This will depend on factors such as the distance between the reader and tags, the environment, and the desired read speed.
- Reader Type: Decide on the reader type based on whether you need a handheld, fixed, or integrated reader. Consider the mobility and location requirements of your application.
- Connectivity Options: Determine the desired communication interfaces for connecting the RFID reader to your computer or controller. Common options include USB, RS-232, Ethernet, and wireless protocols.
- Features and Functionality: Evaluate additional features and functionalities different RFID readers offer. These include data storage capacity, data transfer speed, and support for advanced protocols.
In addition to selecting the right RFID reader, you must ensure RFID tags and software compatibility. Consider the following aspects:
- RFID Tag Compatibility. Verify that the RFID reader you’ve chosen supports the type of RFID tags you intend to use. Check compatibility in terms of frequency, tag protocol, and tag form factor.
- Software Compatibility. Determine if the RFID reader comes with compatible software or if you need to get and install separate software. Ensure the software supports your required functionalities, such as tag configuration and data management.
- Integration with Existing Systems. If you plan to integrate the RFID reader with your existing systems (e.g., inventory management software), confirm that the reader and software have the necessary interfaces and compatibility for seamless integration.
RFID Reader Installation: How to Install and Set Up RFID Reader
After understanding the above RFID reader installation before the basic information, we can now get to the point! Next, we are ready to install the RFID reader that meets the following conditions:
- Software that relies on the PC/SC driver middleware standard.
- USB interface
- You intend to use an RFID reader with the same frequency as the card, key fob, tag, or bracelet. Two common frequencies are 13.56 MHz and 125 kHz. Both the reader and the card must use the same frequency to work properly.
If you have the wrong RFID reader that does not meet these conditions, it can lead to compatibility issues and unsuccessful installation. To resolve this problem, ensure you select a reader that meets the required specifications, such as PC/SC Driver compliance, USB interface, and frequency compatibility.
- Step 1: Establish a Proper Connection with the Computer
- Once you have the right RFID reader, first, you need to establish a reliable connection with your computer. Follow these steps:
- Connect the RFID reader to a USB port on your computer.
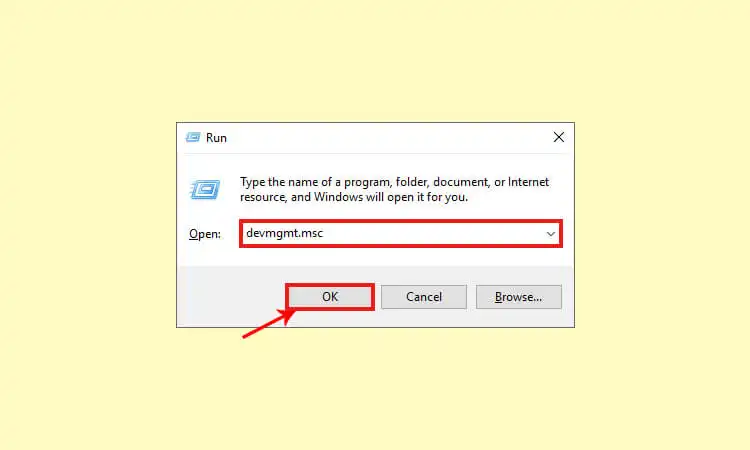
- Press the Windows Key + R, then enter “devmgmt.msc” to open the device manager.
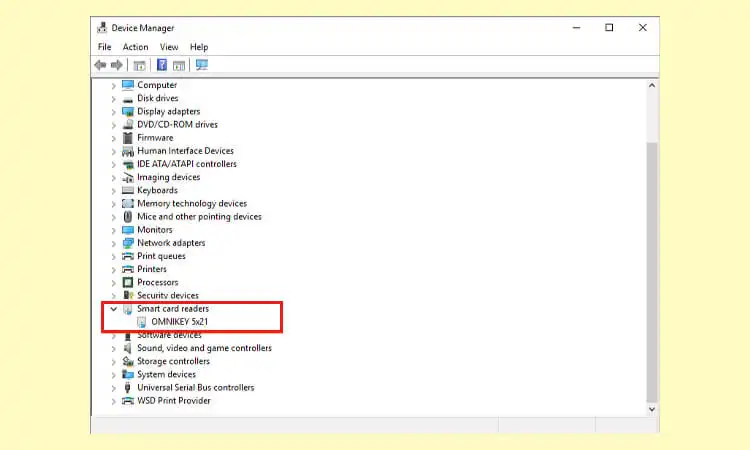
- If their names appear in the smart card reader menu, proceed to the next step.
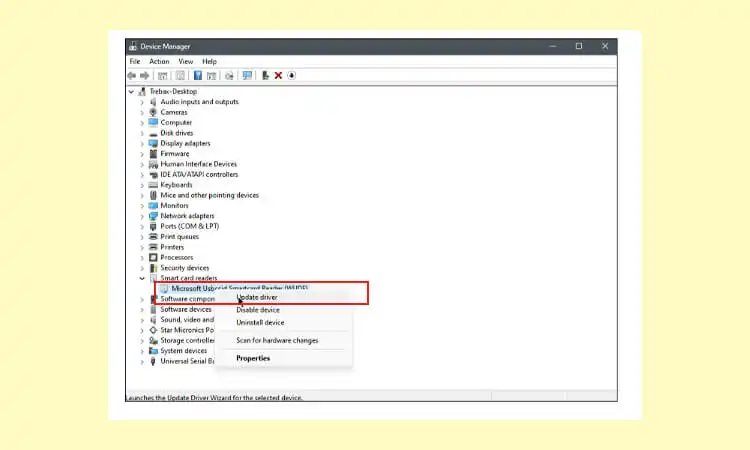
- If not listed, follow these troubleshooting steps:
- Right-click on “Microsoft Usbccid Smartcard Reader (WUDF).”
- Select “Update Driver.”
- Then, choose “Search Automatically for Drivers.”

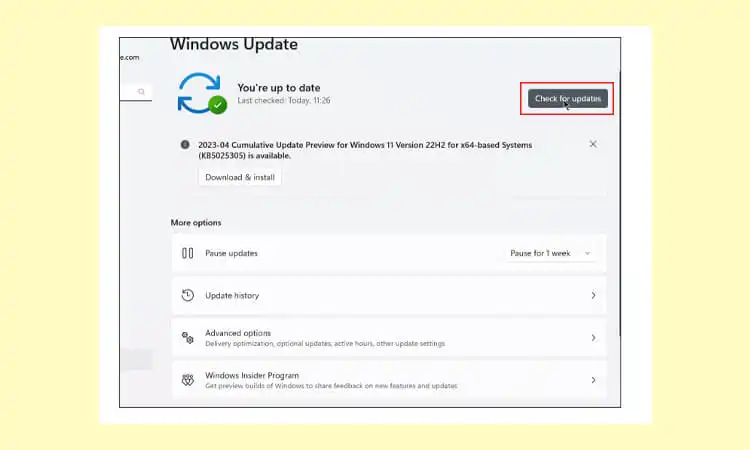
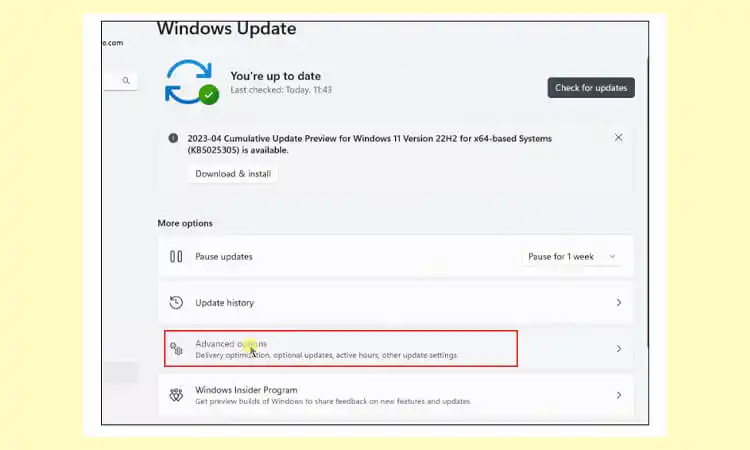
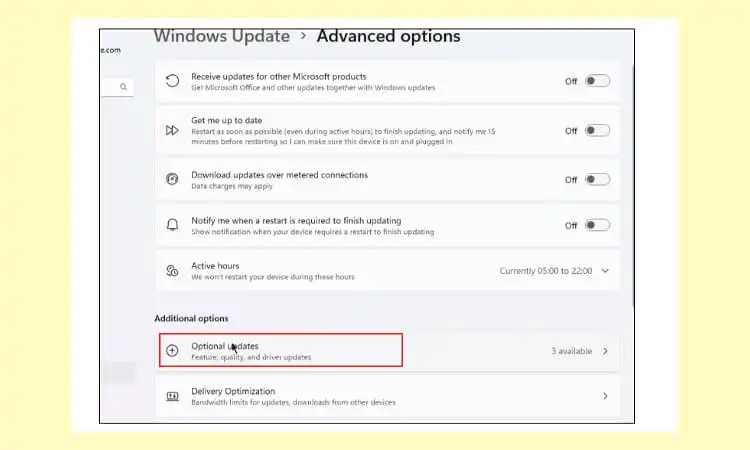
- After that, click on “Search for Updated Driver on Windows Update” to check for any available updates.
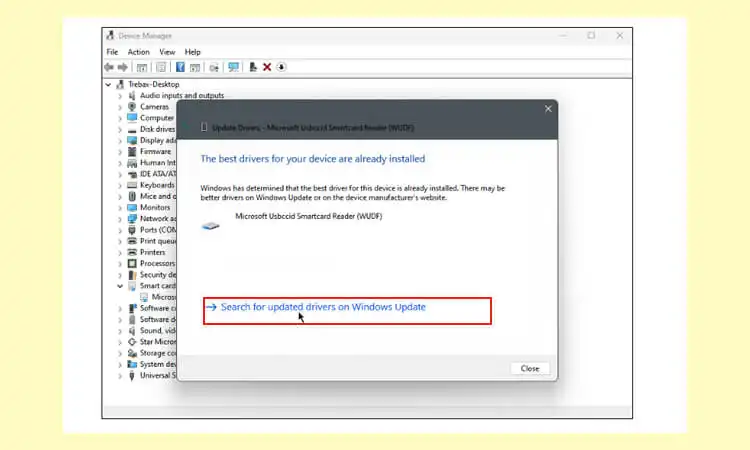
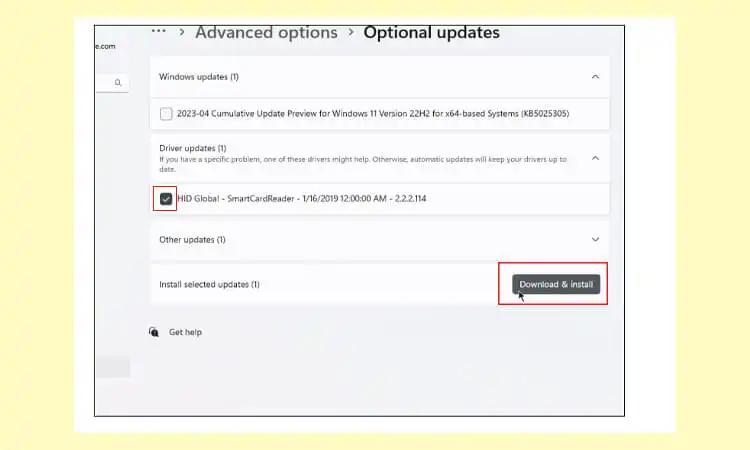
- If necessary, download and install the HID Global – Smartcard Reader update.
- Note: Completing the above steps can hinder the installation process if the computer does not recognize the RFID reader or is incorrectly listed. At this point, you can simply resolve the connection issue by updating the driver or installing the necessary updates. The resolution of this issue will help ensure a proper connection between the reader and the computer.
- Once you have the right RFID reader, first, you need to establish a reliable connection with your computer. Follow these steps:
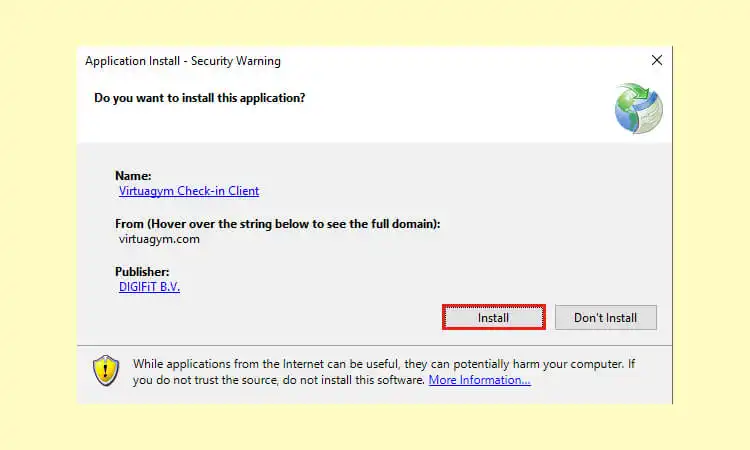
- Step 2: Install the Virtuagym Check-in Client
- Note: The Check-in Software is compatible with Windows computers only (Windows 7 or higher, 64-bit OS, 4GB RAM).
- Navigate to System Settings.
- Click on “Hardware & Integrations.”
- Look for the option “Click Here to Download the Check-in Client Setup” and click on it.
- After downloading, run the .exe file and follow the installation prompts.
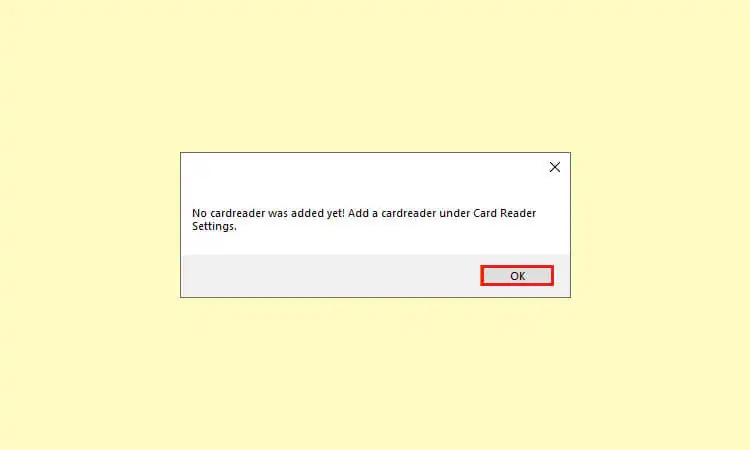
- Upon completion, a message indicates that no reader has been added yet. Click OK to proceed.
- Step 3: Create a Check-in Connection in Your Portal
- Before continuing with the installation, establish a connection in your online portal to facilitate communication between the portal and Check-in Software.
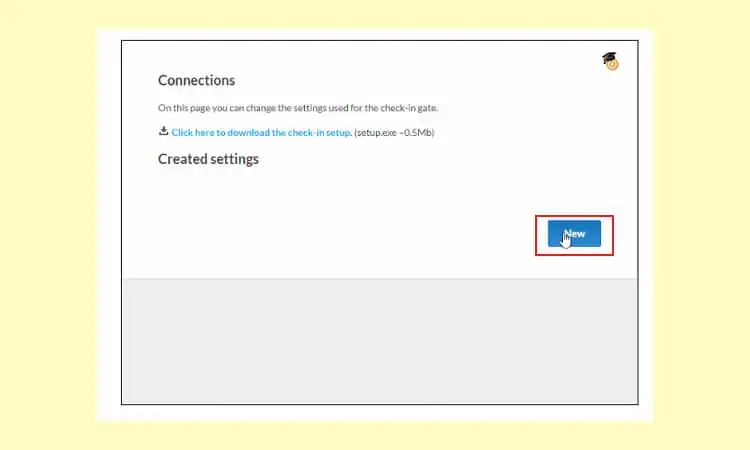
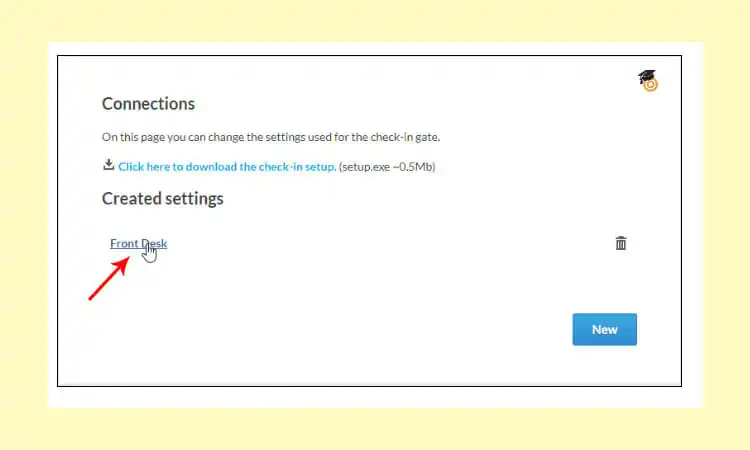
- In your portal, go to System Settings > Hardware Integrations.
- Click “New” to create a new connection.
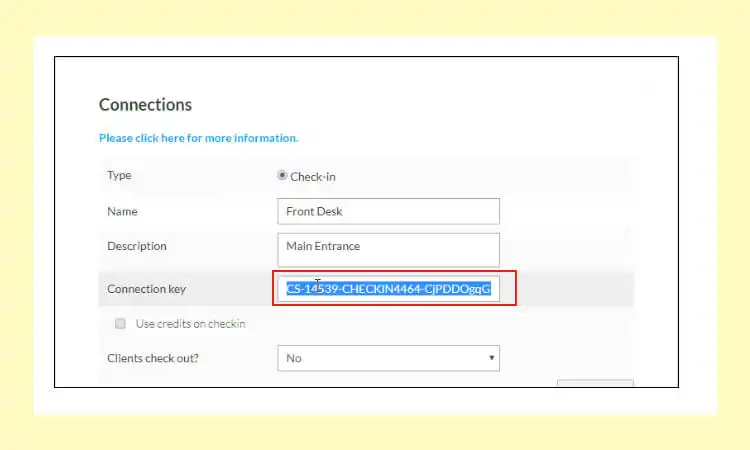
- Provide a name and an optional description for the connection.
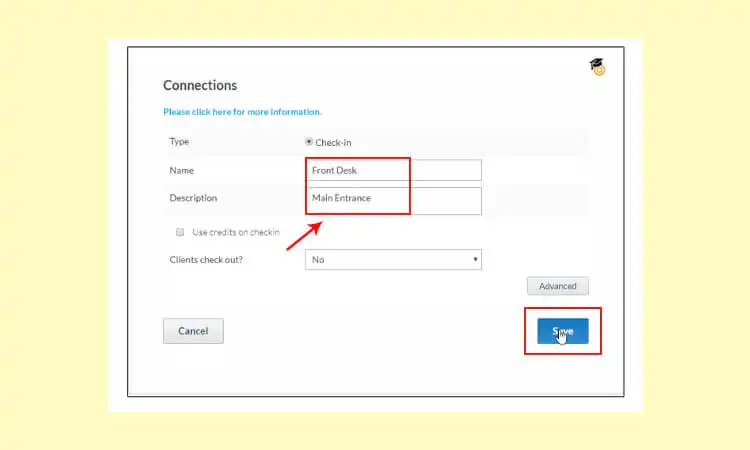
- Save the connection and make a note of the API Key.
- Step 4: RFID Reader Set up the Check-In Client
- Launch the Check-in Client Application by double-clicking its desktop icon if not already open. Acknowledge any notification messages.
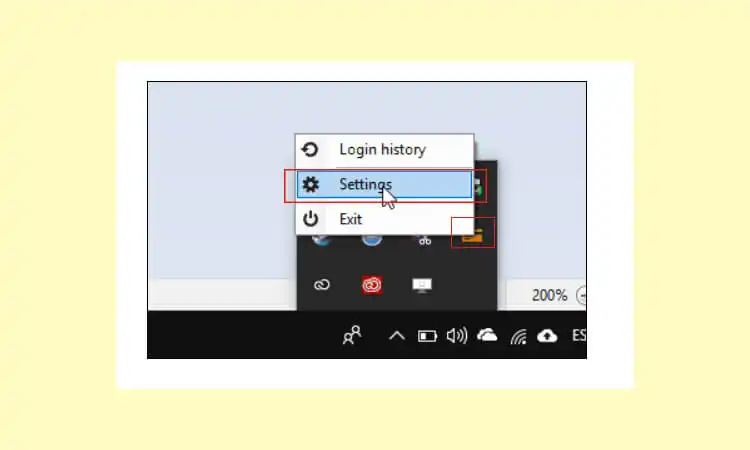
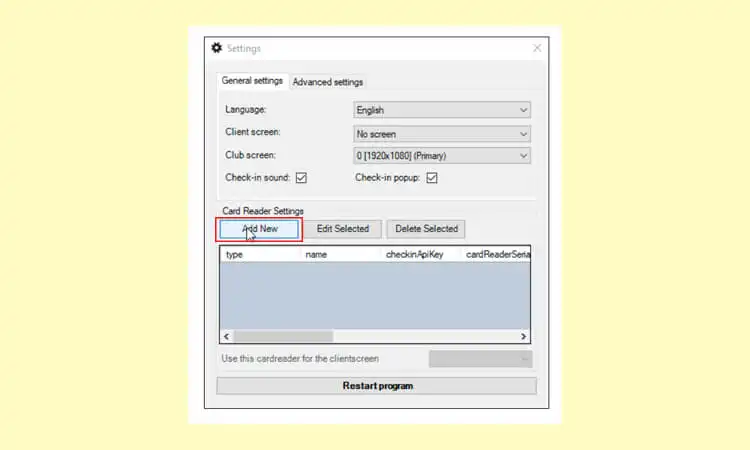
- Access the system tray in the bottom right corner of the screen, right-click the check-in client icon, and select “Settings.”
- If the software is displayed in a different language, choose English from the language drop-down menu and click “Restart Program.”
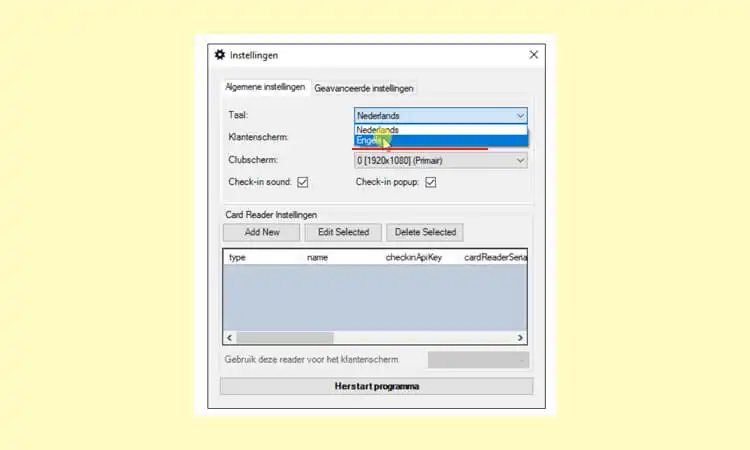
- Click “Add New” to create a new connection.
- Select “RFID” and enter the Connection/Card Reader Name.
- Paste the API Key in the designated textbox.
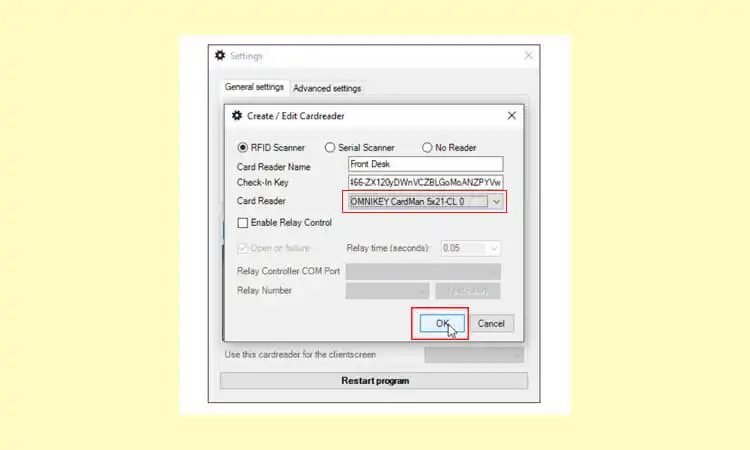
- Choose the appropriate reader from the drop-down menu and click OK.
- Please restart the program for the changes to take effect.
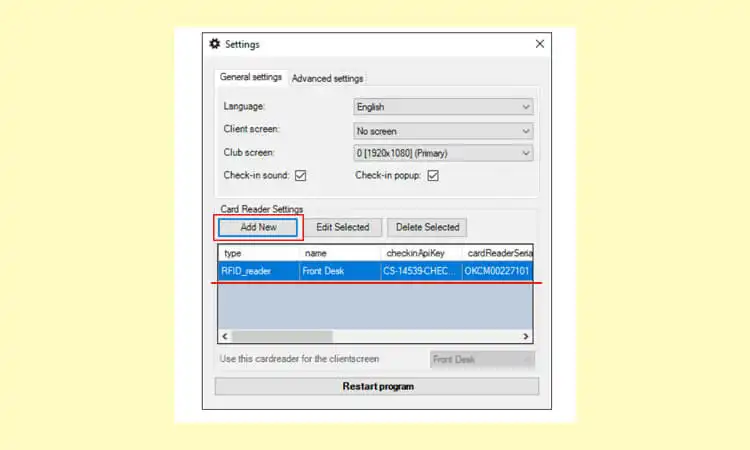
- Step 5: Test the Connection
- To ensure the reader functions correctly, perform a test scan: Pass a card/tag over the reader.
If the Check-in client responds to the scan with a notification at the bottom right of your screen and a record in the Login History, the reader is successfully configured.
Now you have completed all the steps to install the RFID reader! If you encounter any issues during the installation process, such as failed downloads or installation errors. You can ensure a stable internet connection and try downloading the Check-in Client software again. If the problem persists, contact Virtuagym support for assistance.
FAQs (Frequently Asked Questions)
-
Q: How do I determine if an RFID reader is compatible with my cards or tags?
A: To ensure compatibility, check the frequency of your cards or tags and compare it with the frequency supported by the RFID reader. The reader and the cards/tags must operate at the same frequency for proper communication.
-
Q: Can I use any USB RFID reader with my computer?
A: USB RFID readers are generally compatible with most computers with USB ports. However, you need to ensure that the RFID reader is PC/SC Driver Compliant and supported by your computer’s operating system for seamless integration.
-
Q: What is the significance of PC/SC Driver Compliance for an RFID reader?
A: PC/SC Driver Compliance refers to the reader’s adherence to the PC/SC (Personal Computer/Smart Card) standard, which allows the reader to communicate with smart cards and other smart devices. It ensures the reader can seamlessly interface with software applications using the PC/SC protocol.
-
Q: Can I install and use multiple RFID readers on the same computer?
A: Yes, it is possible to install and use multiple RFID readers on a single computer. However, it’s important to ensure each reader has its unique identifier and is properly configured in the software settings to avoid conflicts.
-
Q: How can I troubleshoot connectivity issues between the RFID reader and the computer?
A: If you are experiencing connectivity issues, ensure the reader is correctly connected to the computer via USB. Verify that the necessary drivers are installed and up-to-date. Additionally, check the device manager to ensure the operating system recognizes the reader. If problems persist, consult the manufacturer’s documentation or support for further troubleshooting guidance.


 Guide")


